
# Webflow x Getform Installation
# Installation
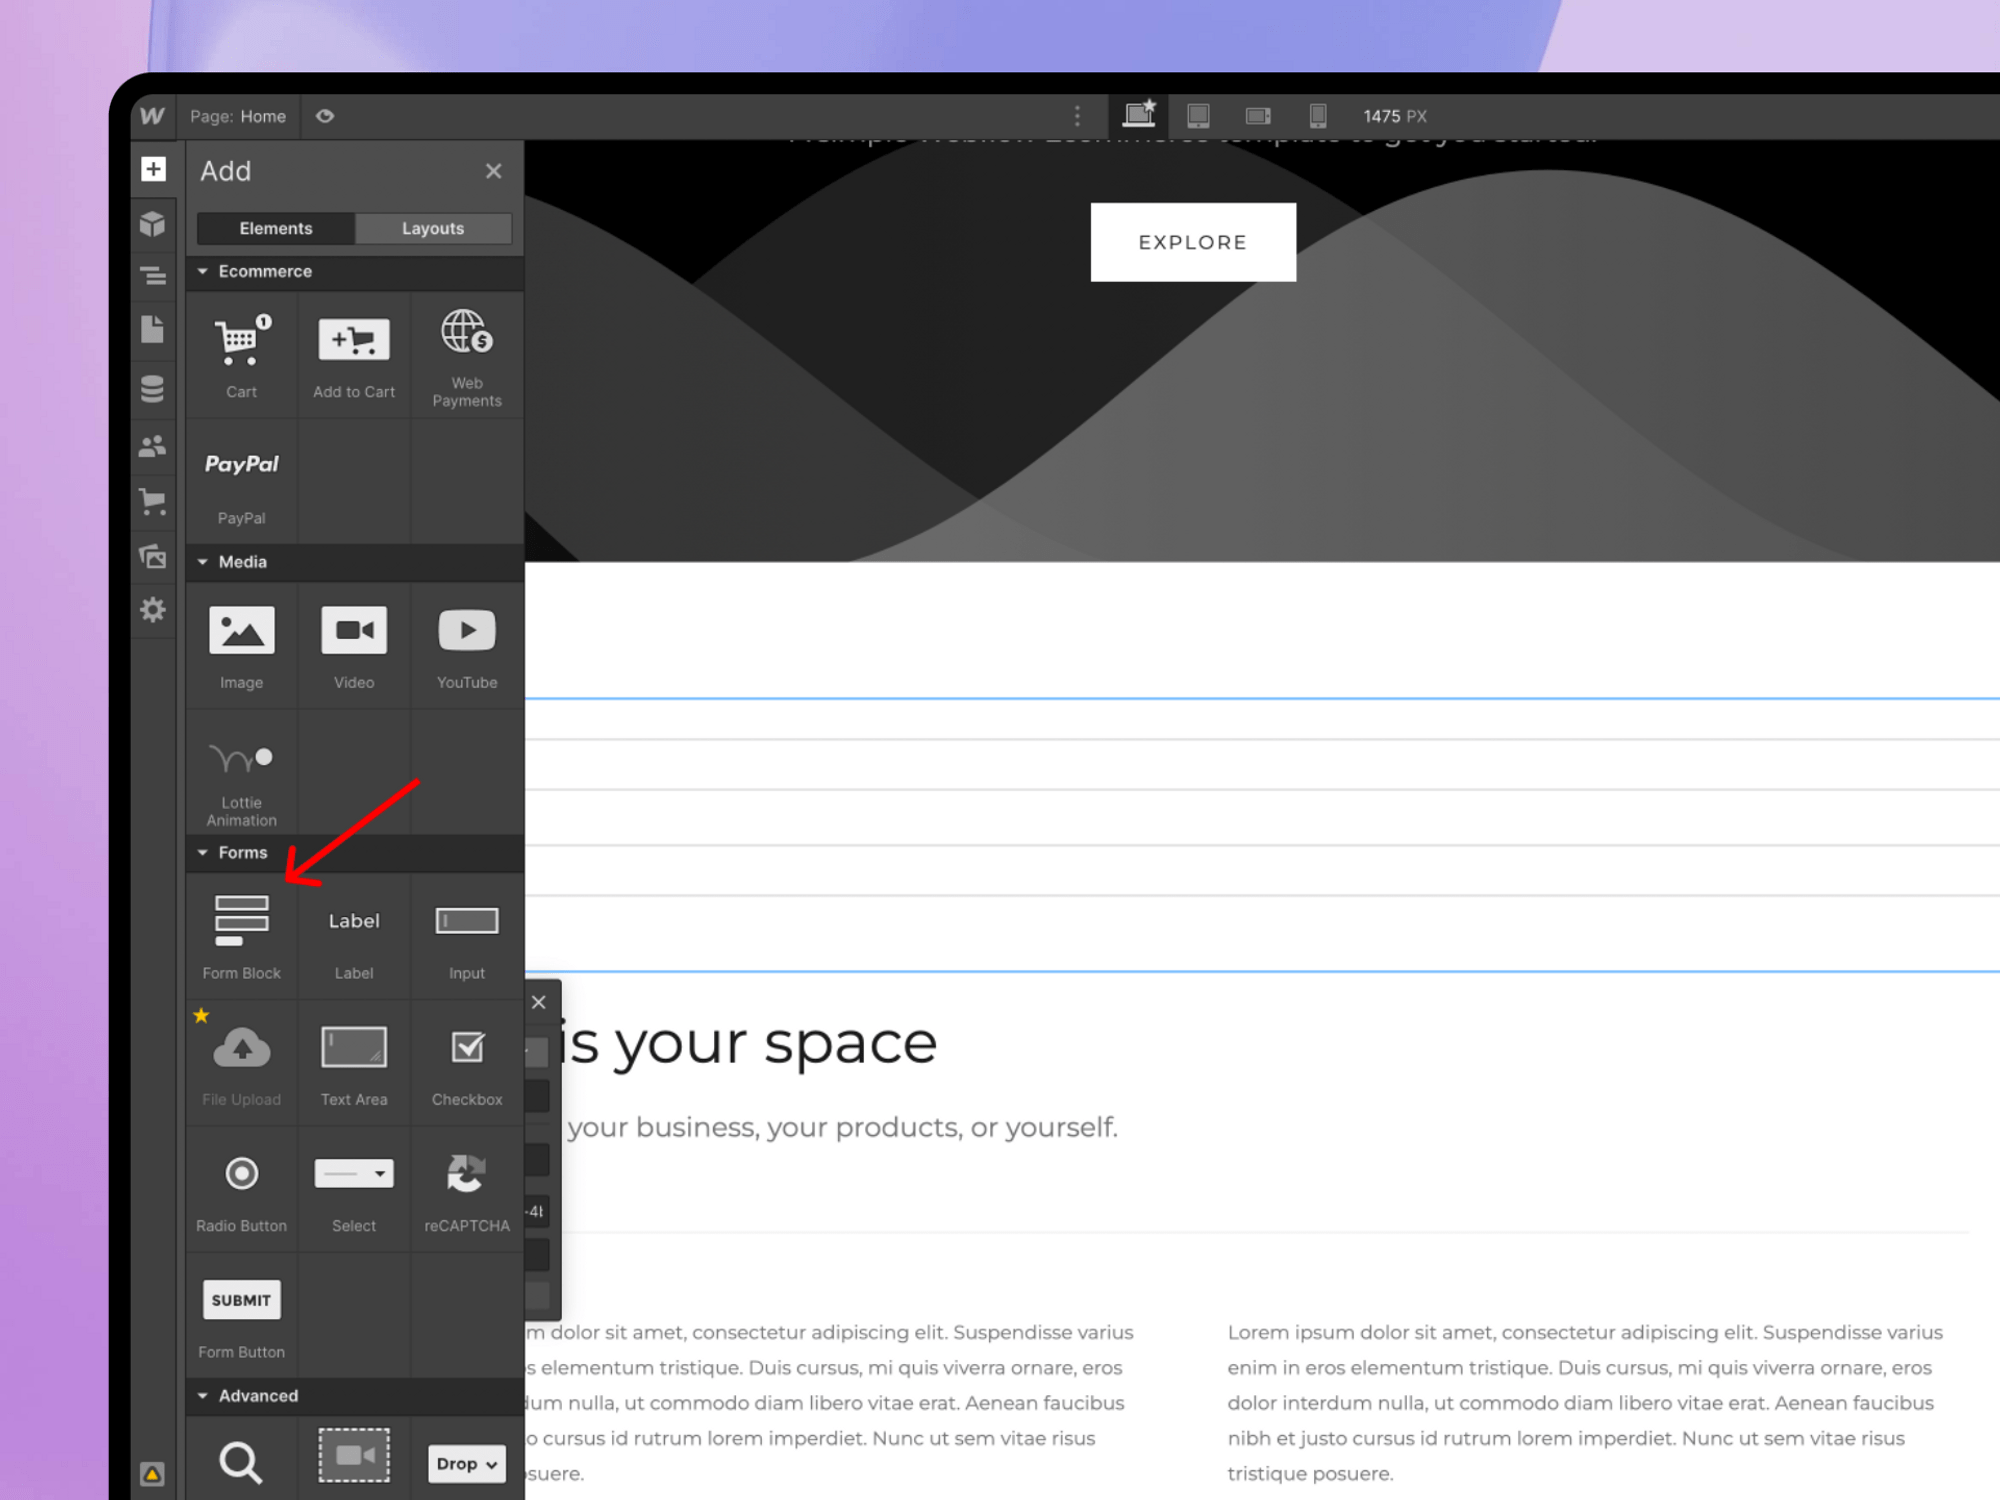
# Step 1 — Adding Form Component to Your Webflow Page
(If you already have a form, open it in the Designer and proceed to Step 2.) Open your website in the Webflow Designer and follow these steps:
- Click on Add Elements (+ sign).
- Unfold the Forms dropdown.
- Drag Form block onto the page.
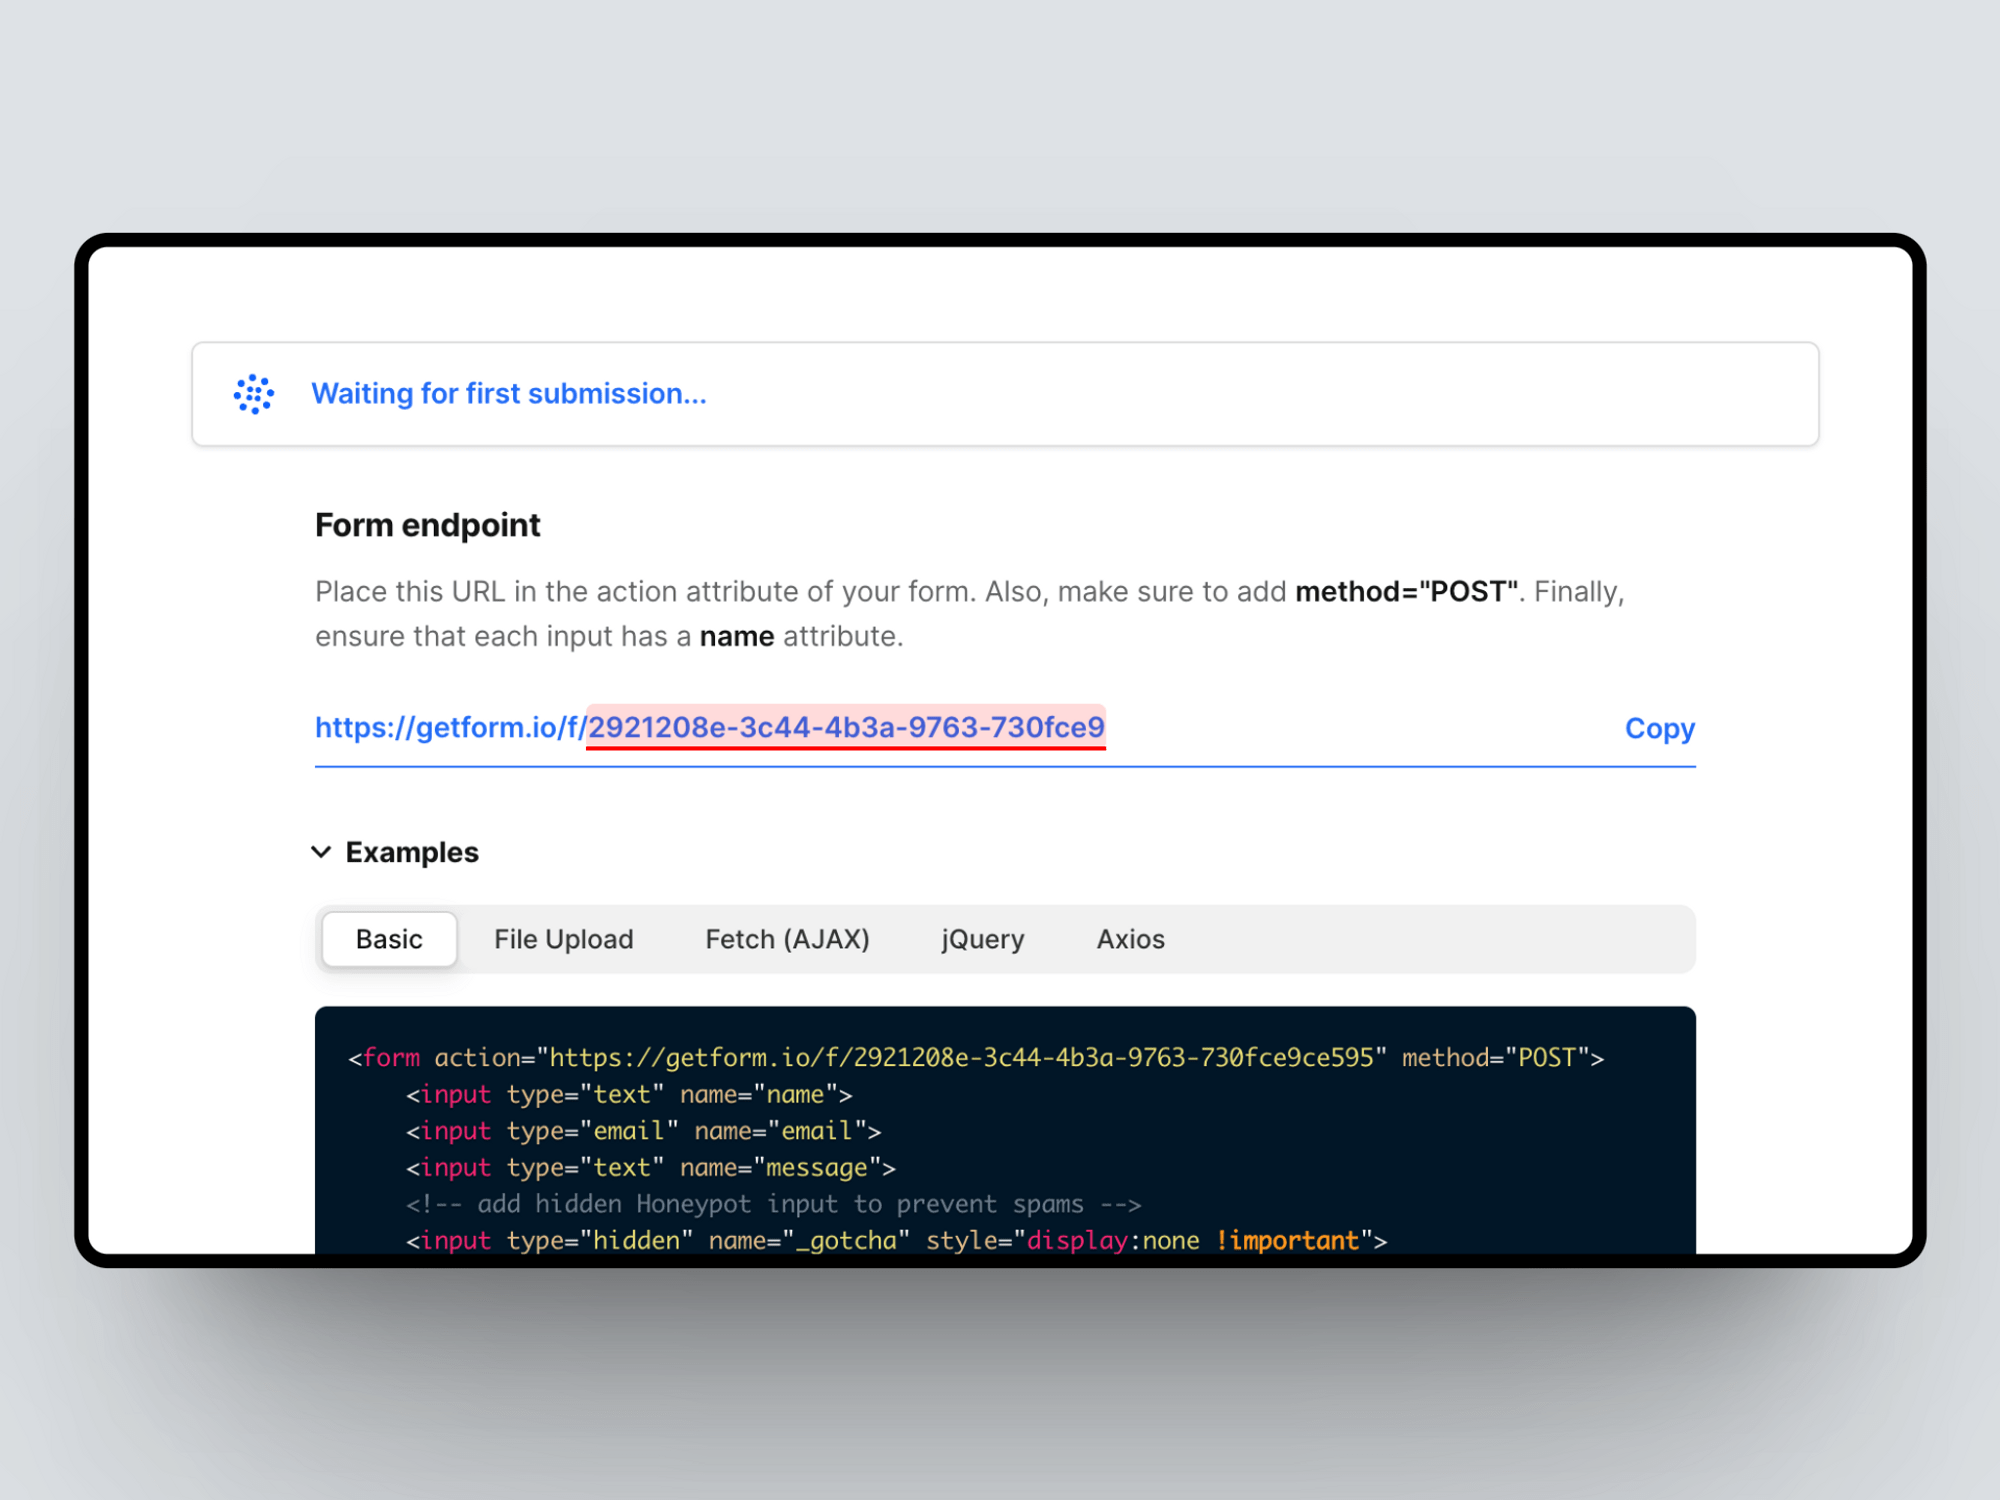
# Step 2 — Obtaining Getform Endpoint
- Navigate to getform.io.
- Click on Create form (+), select a timezone and enter a form name.
- Copy the Form ID located at the end of the form endpoint (getform.io/f/{form-ID}).
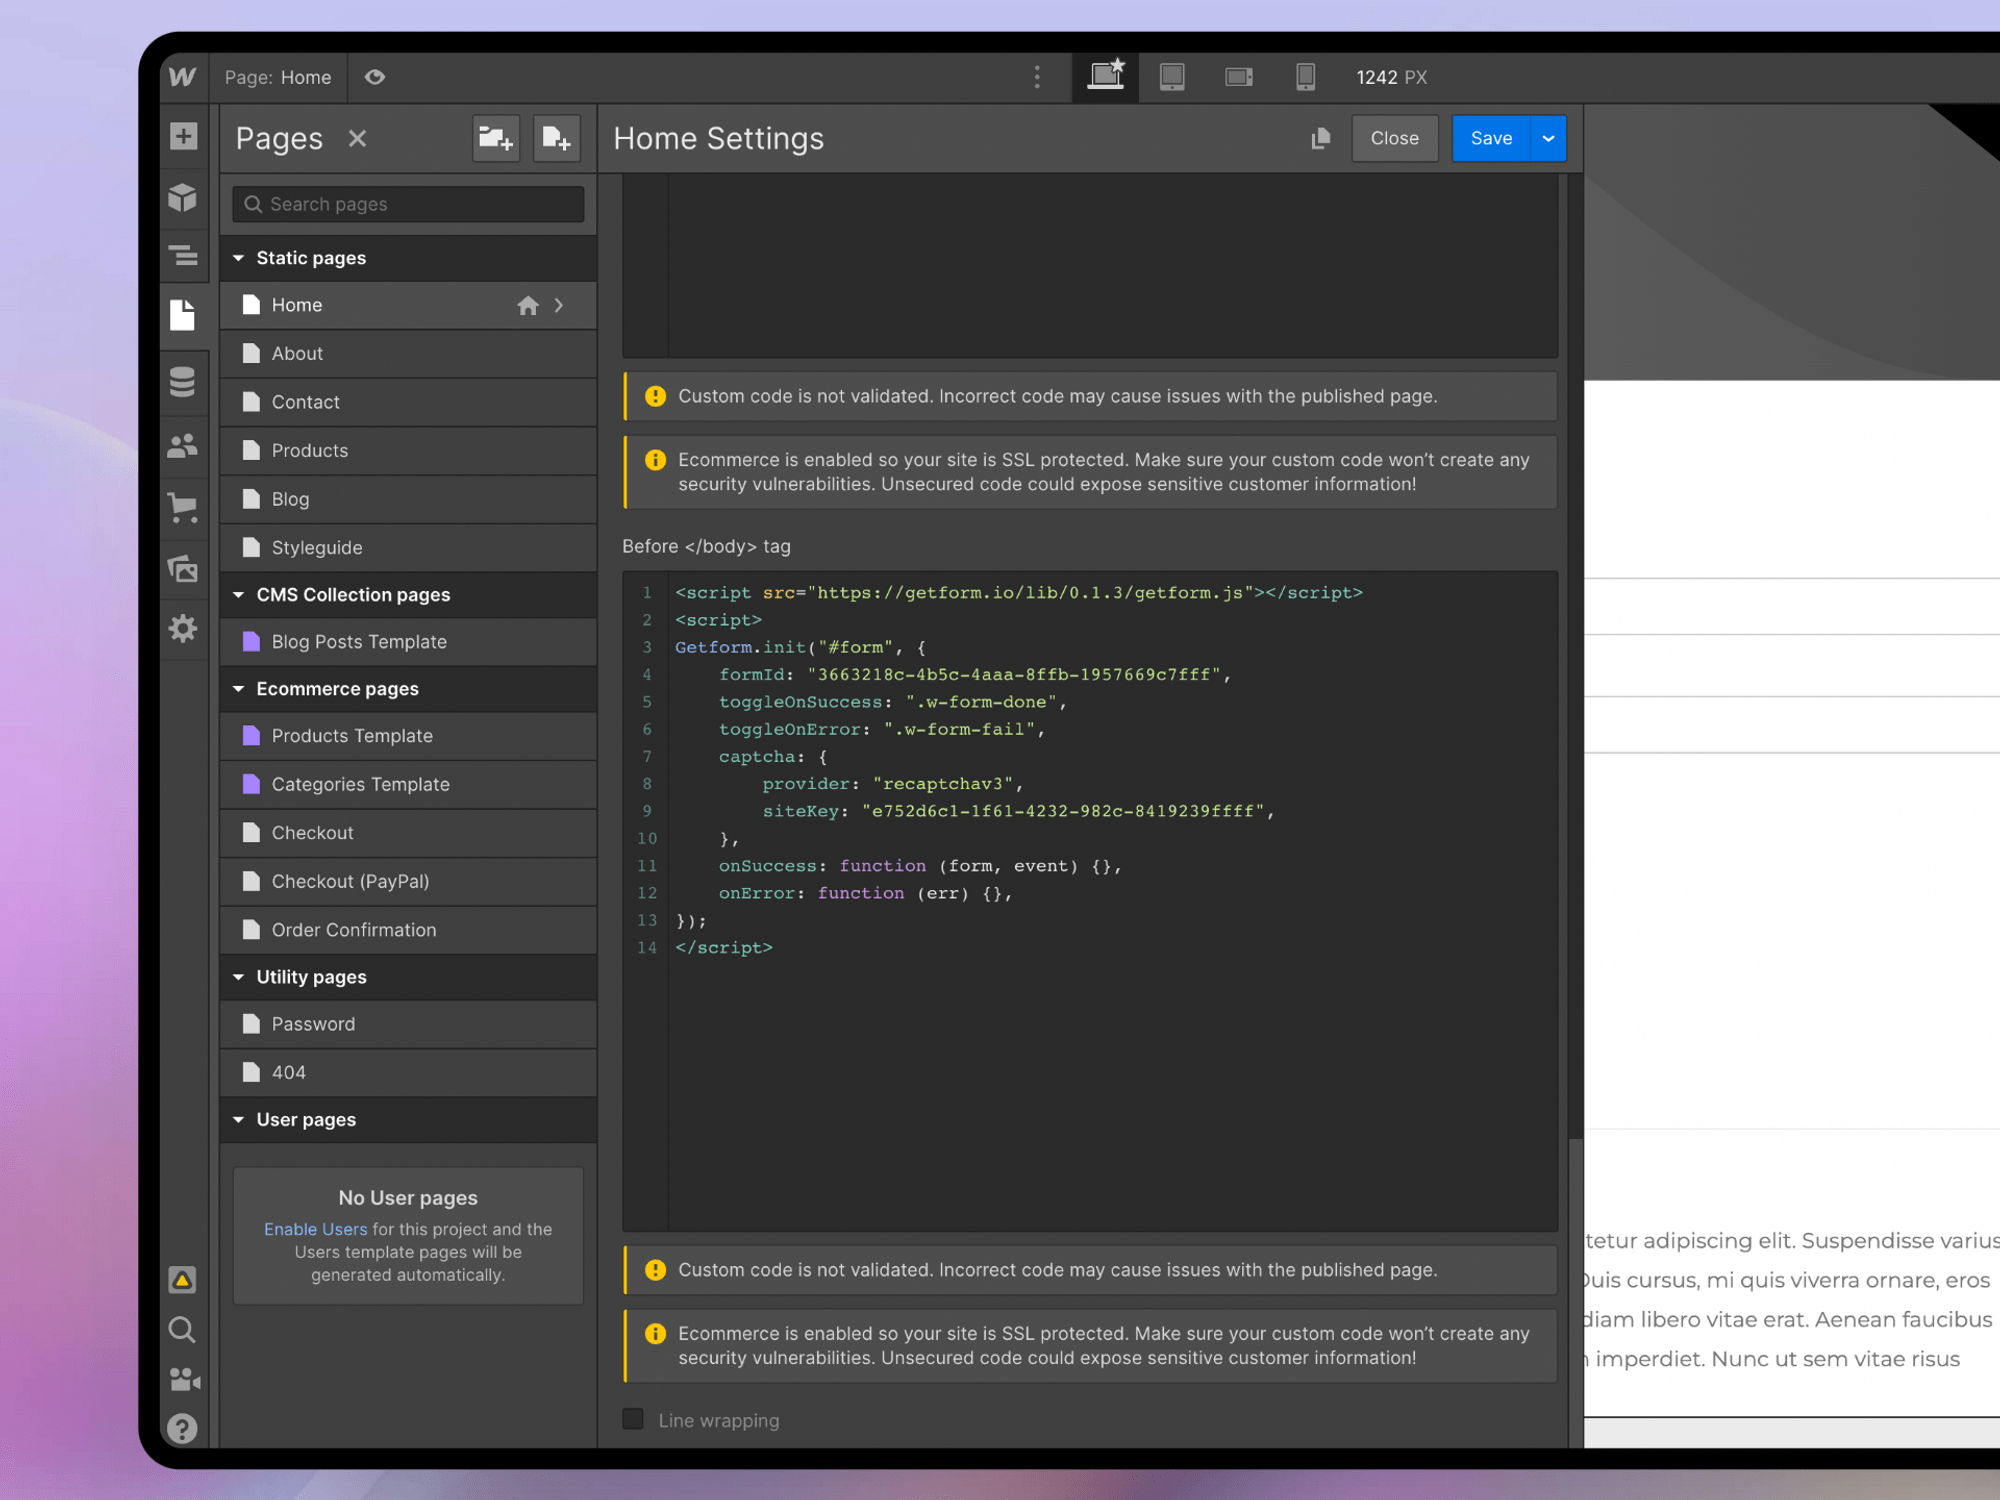
# Step 3 — Adding Getform.js to your Webflow page
- Click on Pages.
- Click on Edit Page Settings.
- Paste the below code and ensure you replace GETFORM_FORM_ID with your Getform Form ID.
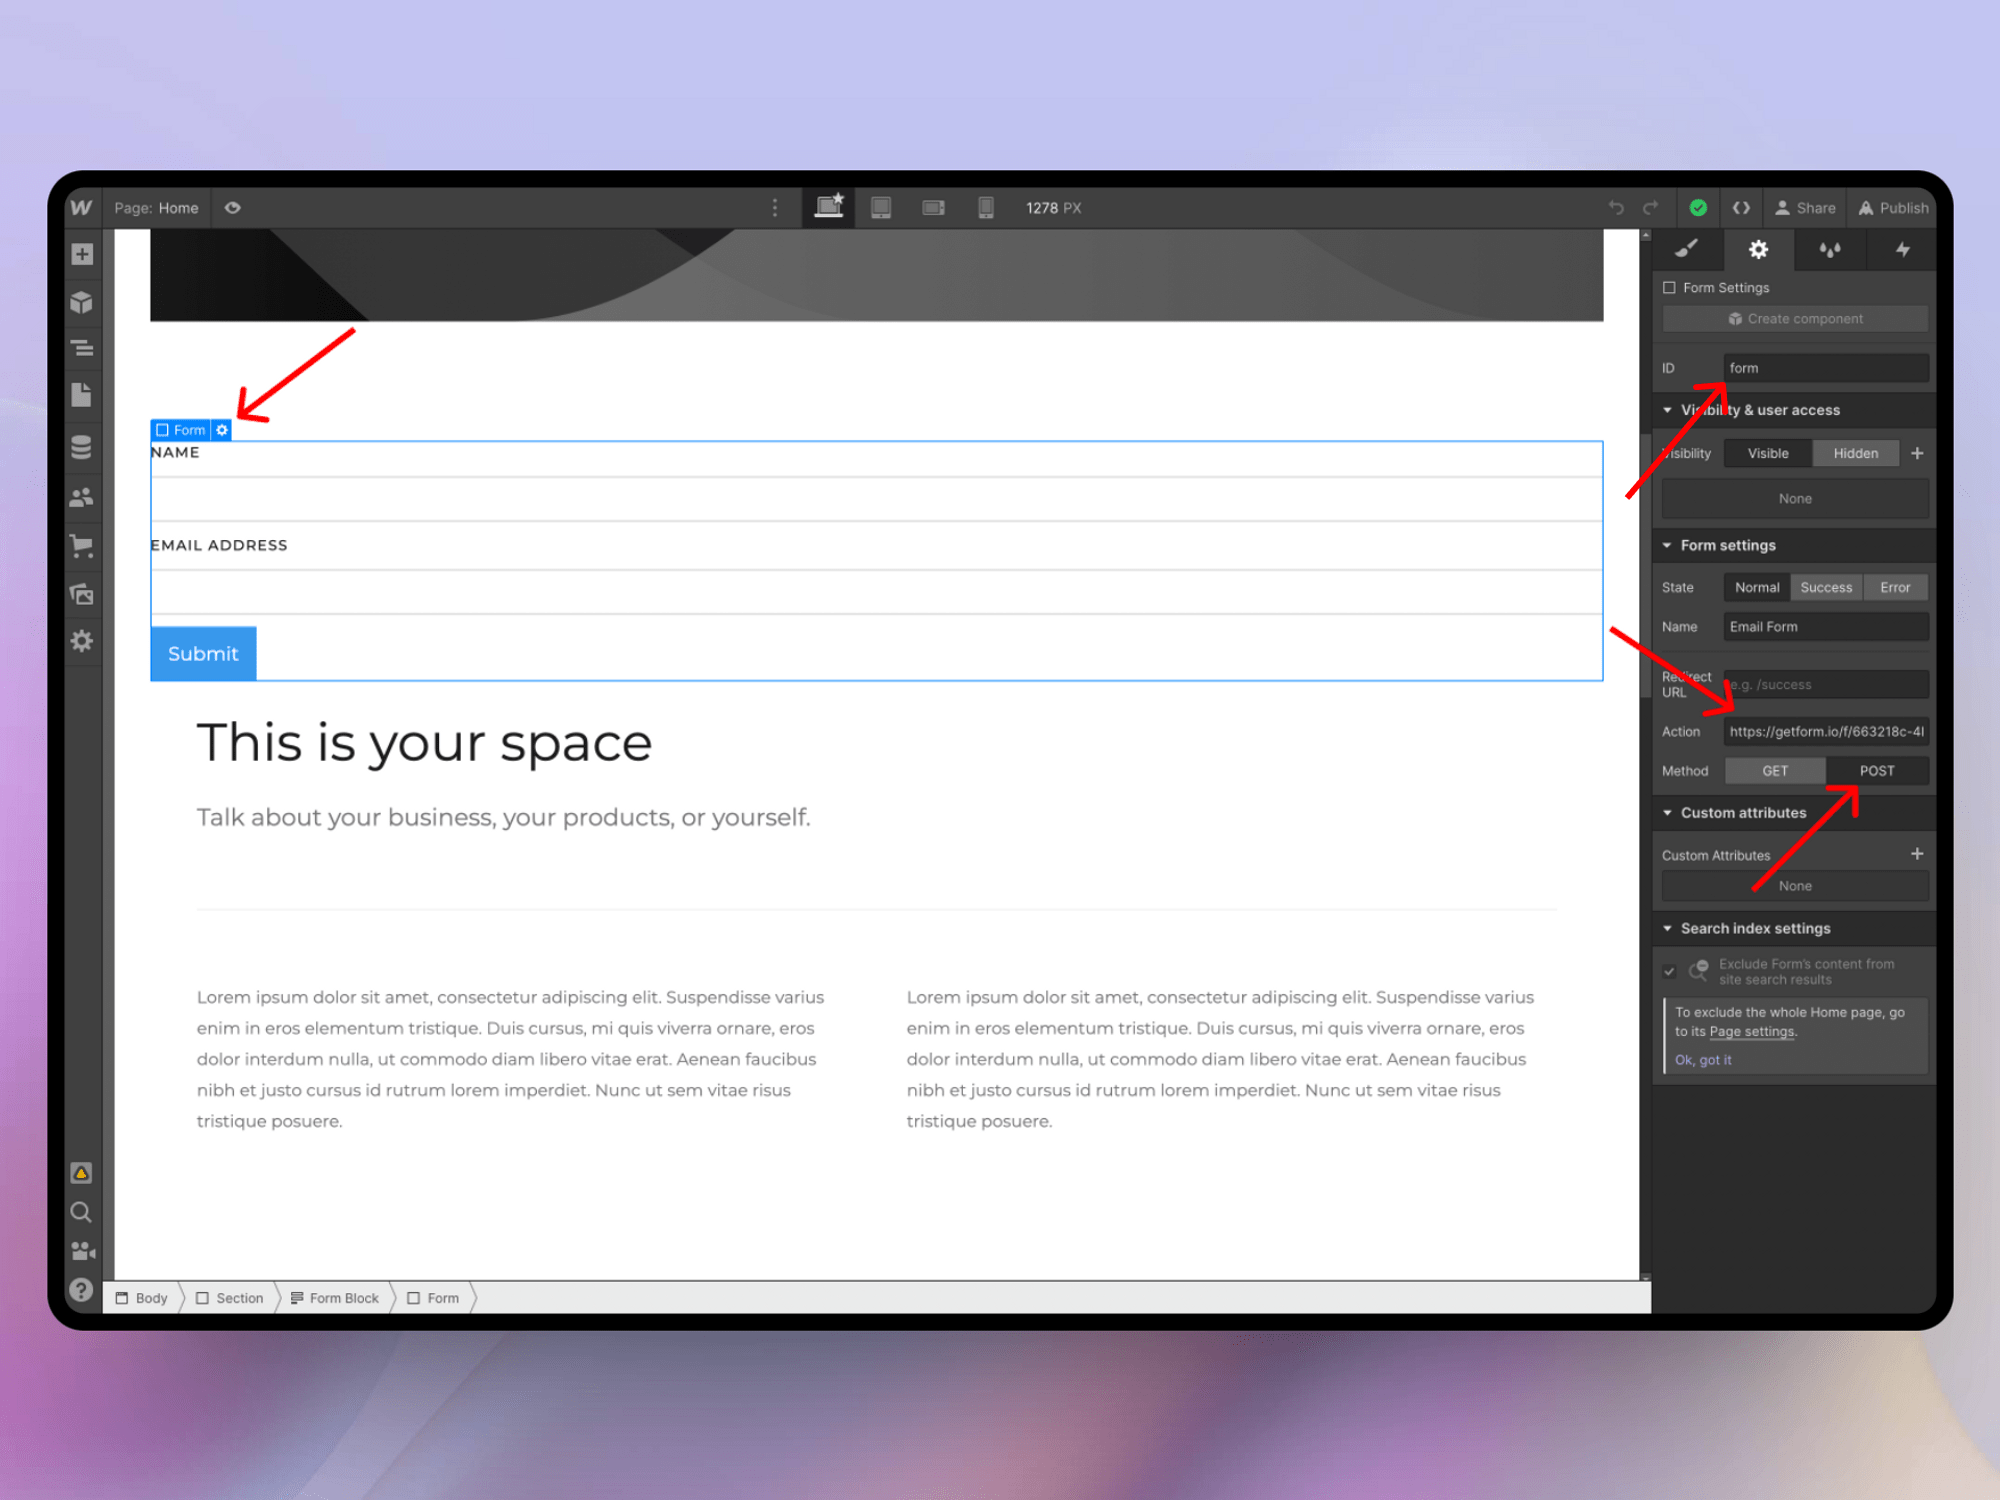
- Select the form and click Element Settings.
- Insert your Getform endpoint into the
"action"field, and set the method to POST. - Add
formas the ID for the form element - Send a test submission and preview your submission on Getform.
<script type="text/javascript" src="https://getform.io/lib/v1/getform.js"></script>
<script>
	Getform.init("#form", { // Form selector
      formId: "GETFORM_FORM_ID", // Form ID from getform.io
      toggleOnSuccess: ".w-form-done",  // Element toggles on submit
      toggleOnError: ".w-form-fail",  // Element toggles on error
      onSuccess: function (form, event) { }, // Success callback
      onError: function (err) { } // Error callback
	});
</script>
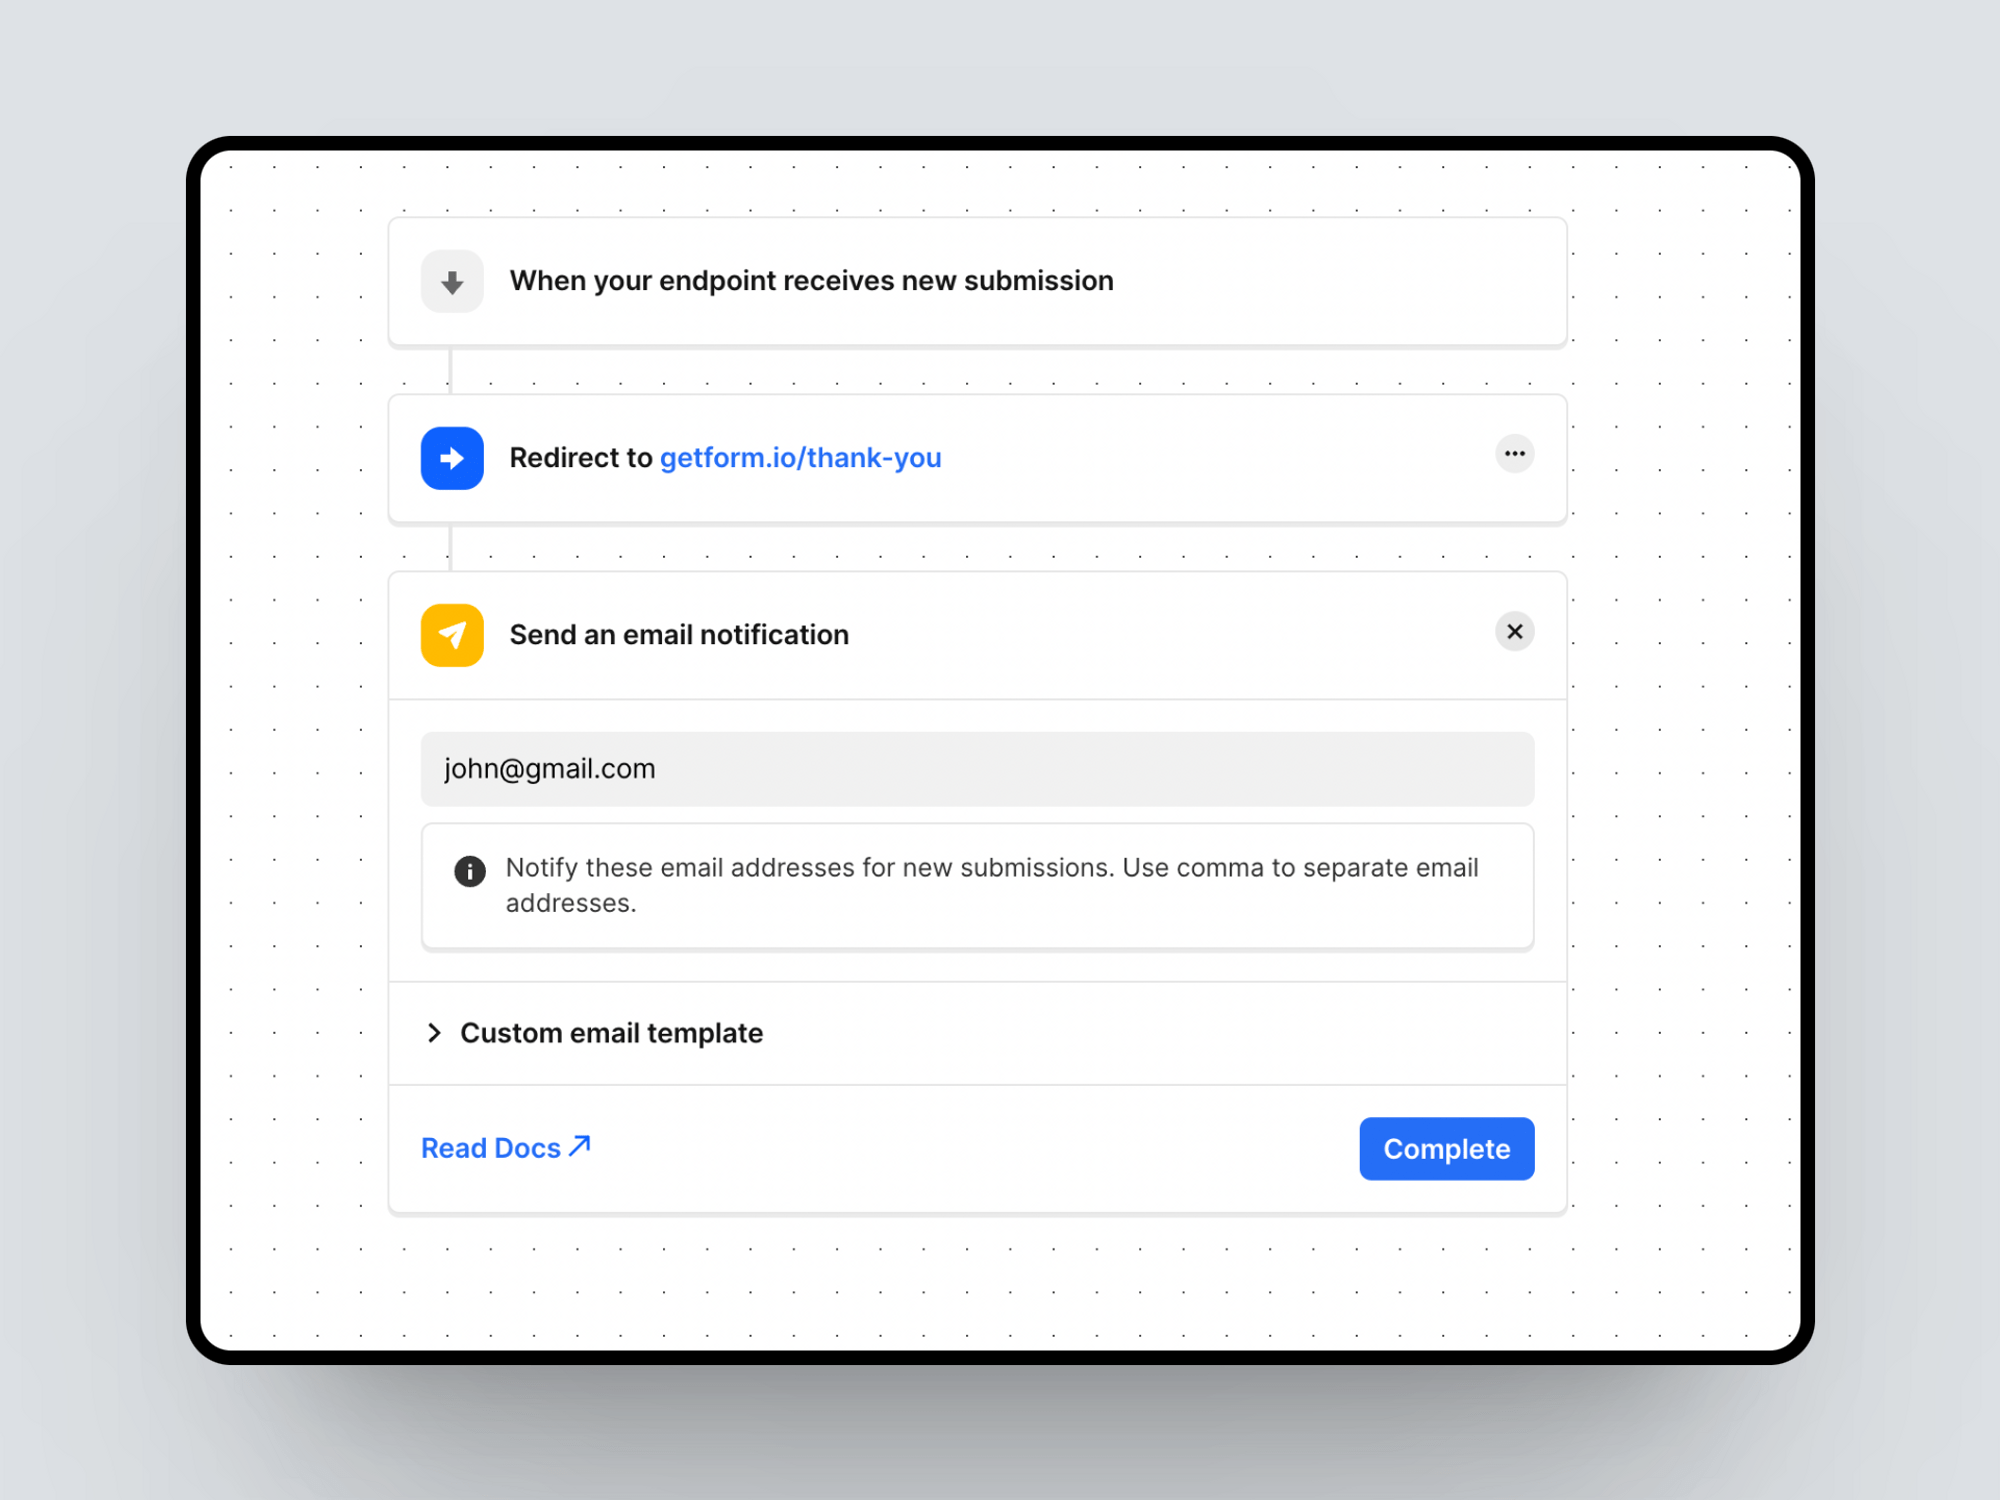
# Email Notifications
You can receive notifications at your chosen email addresses for every submission received from your Webflow contact forms.
- Click on the Automation icon on the form detail page.
- Click Edit on the “Send an email notification” action
- Enter the email addresses where you wish to receive notifications for each form submission. Your email address is set as the default.
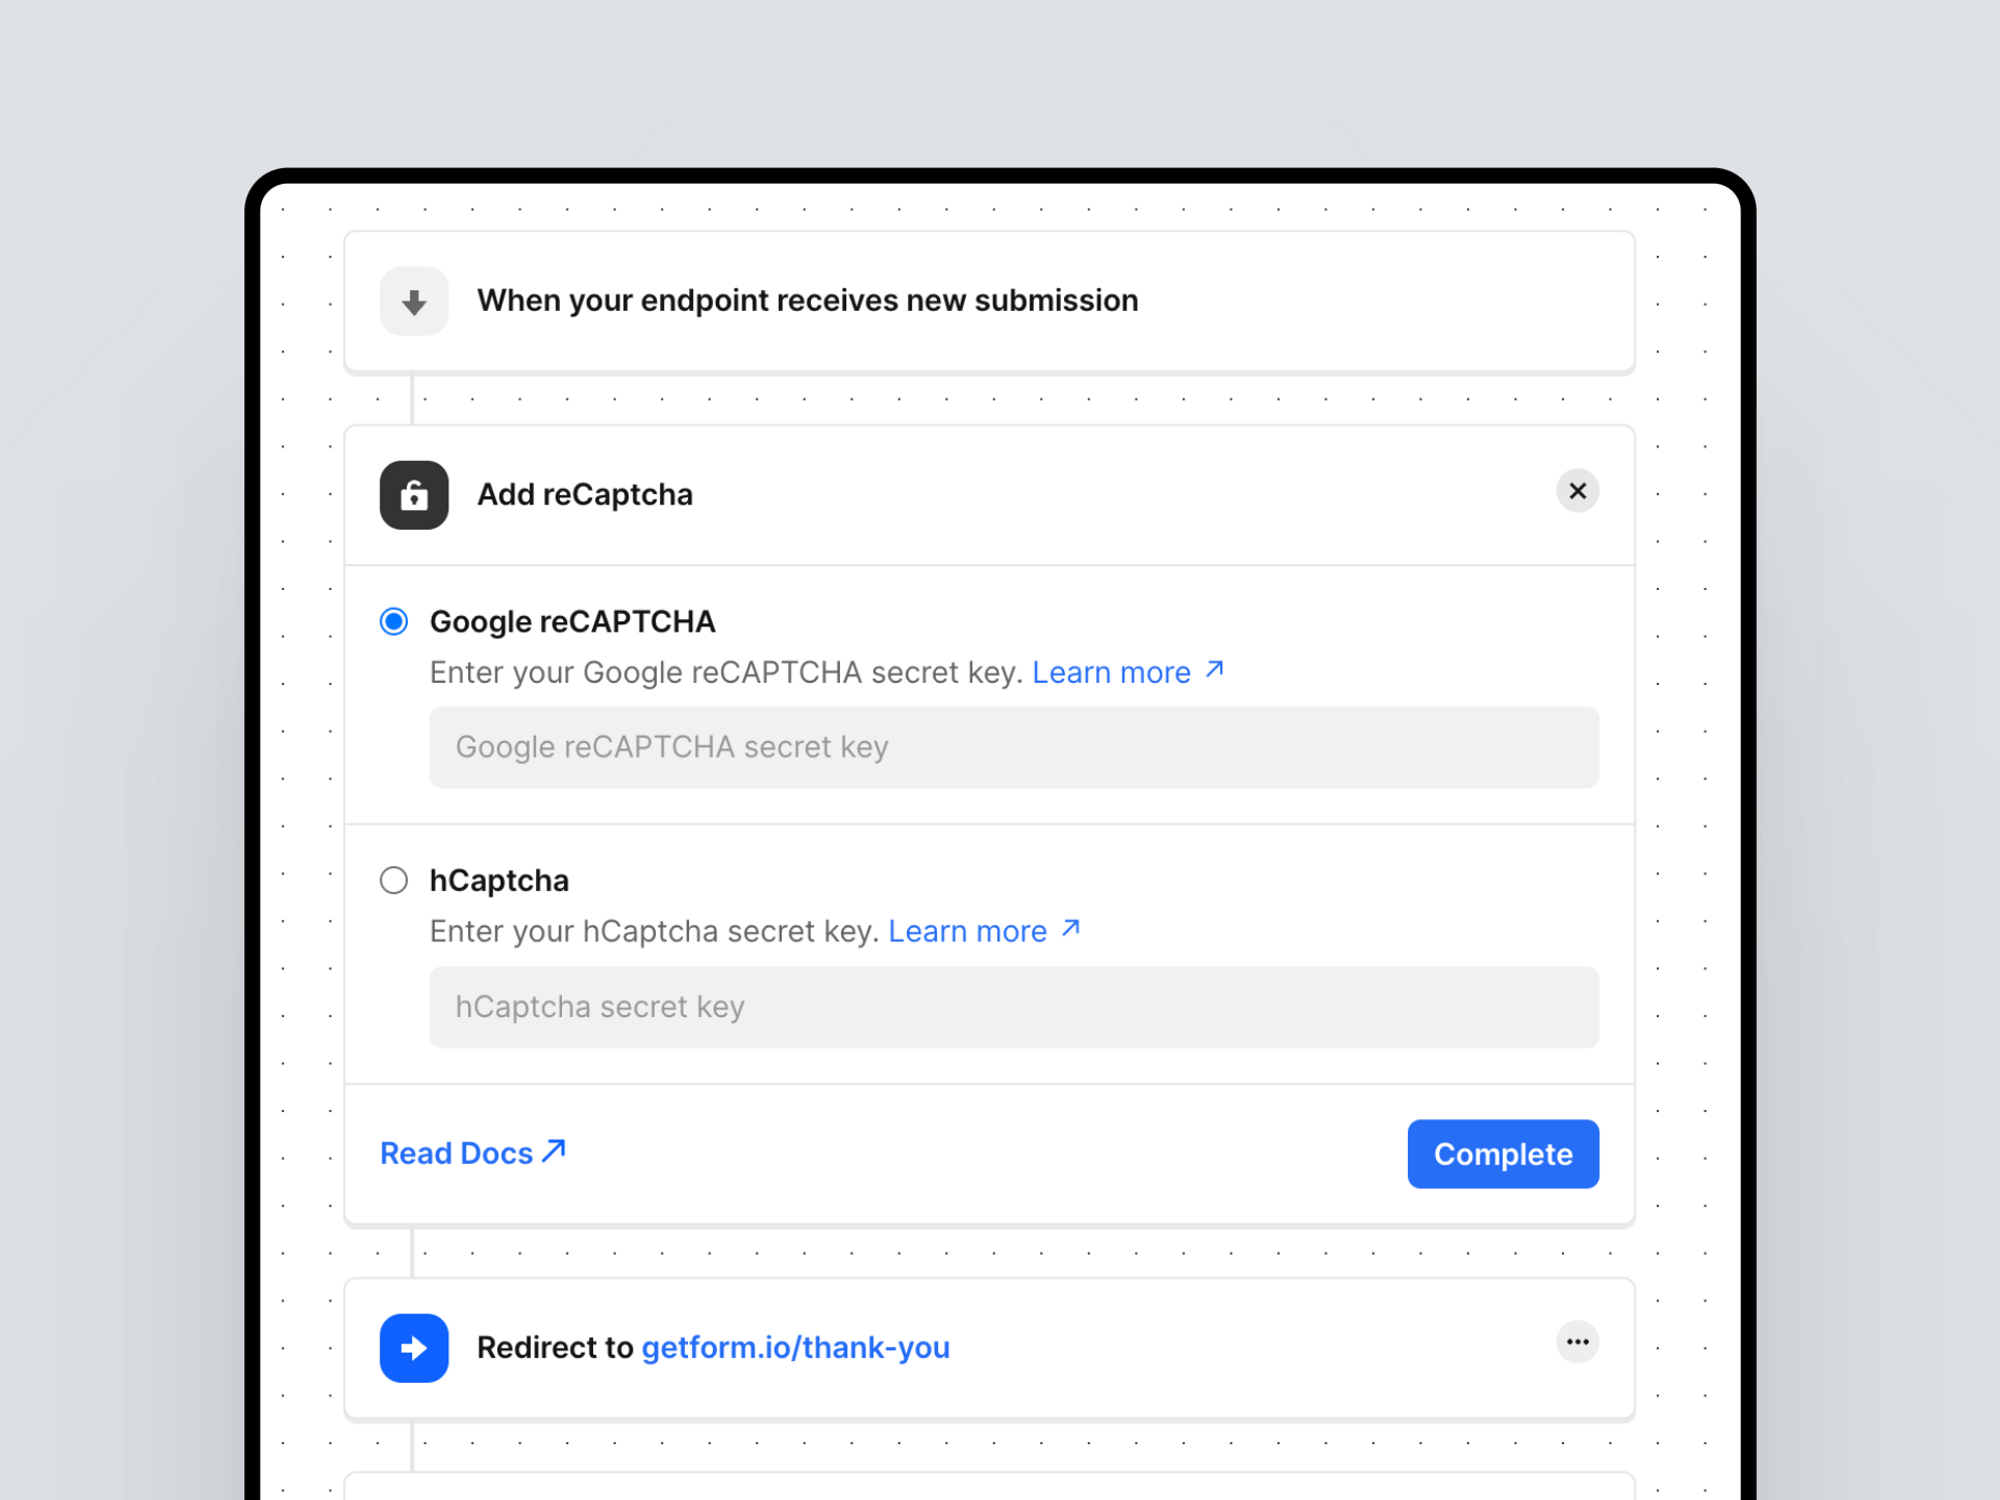
# Adding reCAPTCHA or hCaptcha
We recommend that all our users include a CAPTCHA solution in their web forms. Currently, we support reCAPTCHA v3 and hCaptcha captcha solutions.
# Step 1 — Adding “captcha” site key
Add the following properties as options to the Getform.init() function:
provider: "recaptchav3" or "hcaptcha"siteKey: Get your site key from reCAPTCHA (opens new window) or hCaptcha (opens new window)
<script type="text/javascript" src="https://getform.io/lib/v1/getform.js"></script>
<script>
 Getform.init("#form", {
  formId: "GETFORM_FORM_ID",
  toggleOnSuccess: ".w-form-done",
  toggleOnError: ".w-form-fail",
  captcha: {
    provider: "recaptchav3", // recaptchav3 or hcaptcha
    siteKey: "YOUR_SITE_KEY", // Sitekey
  }
});
</script>
# Step 2 — Adding “captcha” secret key
- Click on Automation icon on the form detail page.
- Click “Captcha” action
- Add your “reCAPTCHA v3” or “hCaptcha” secret key
- Click Save and also Save your Automation
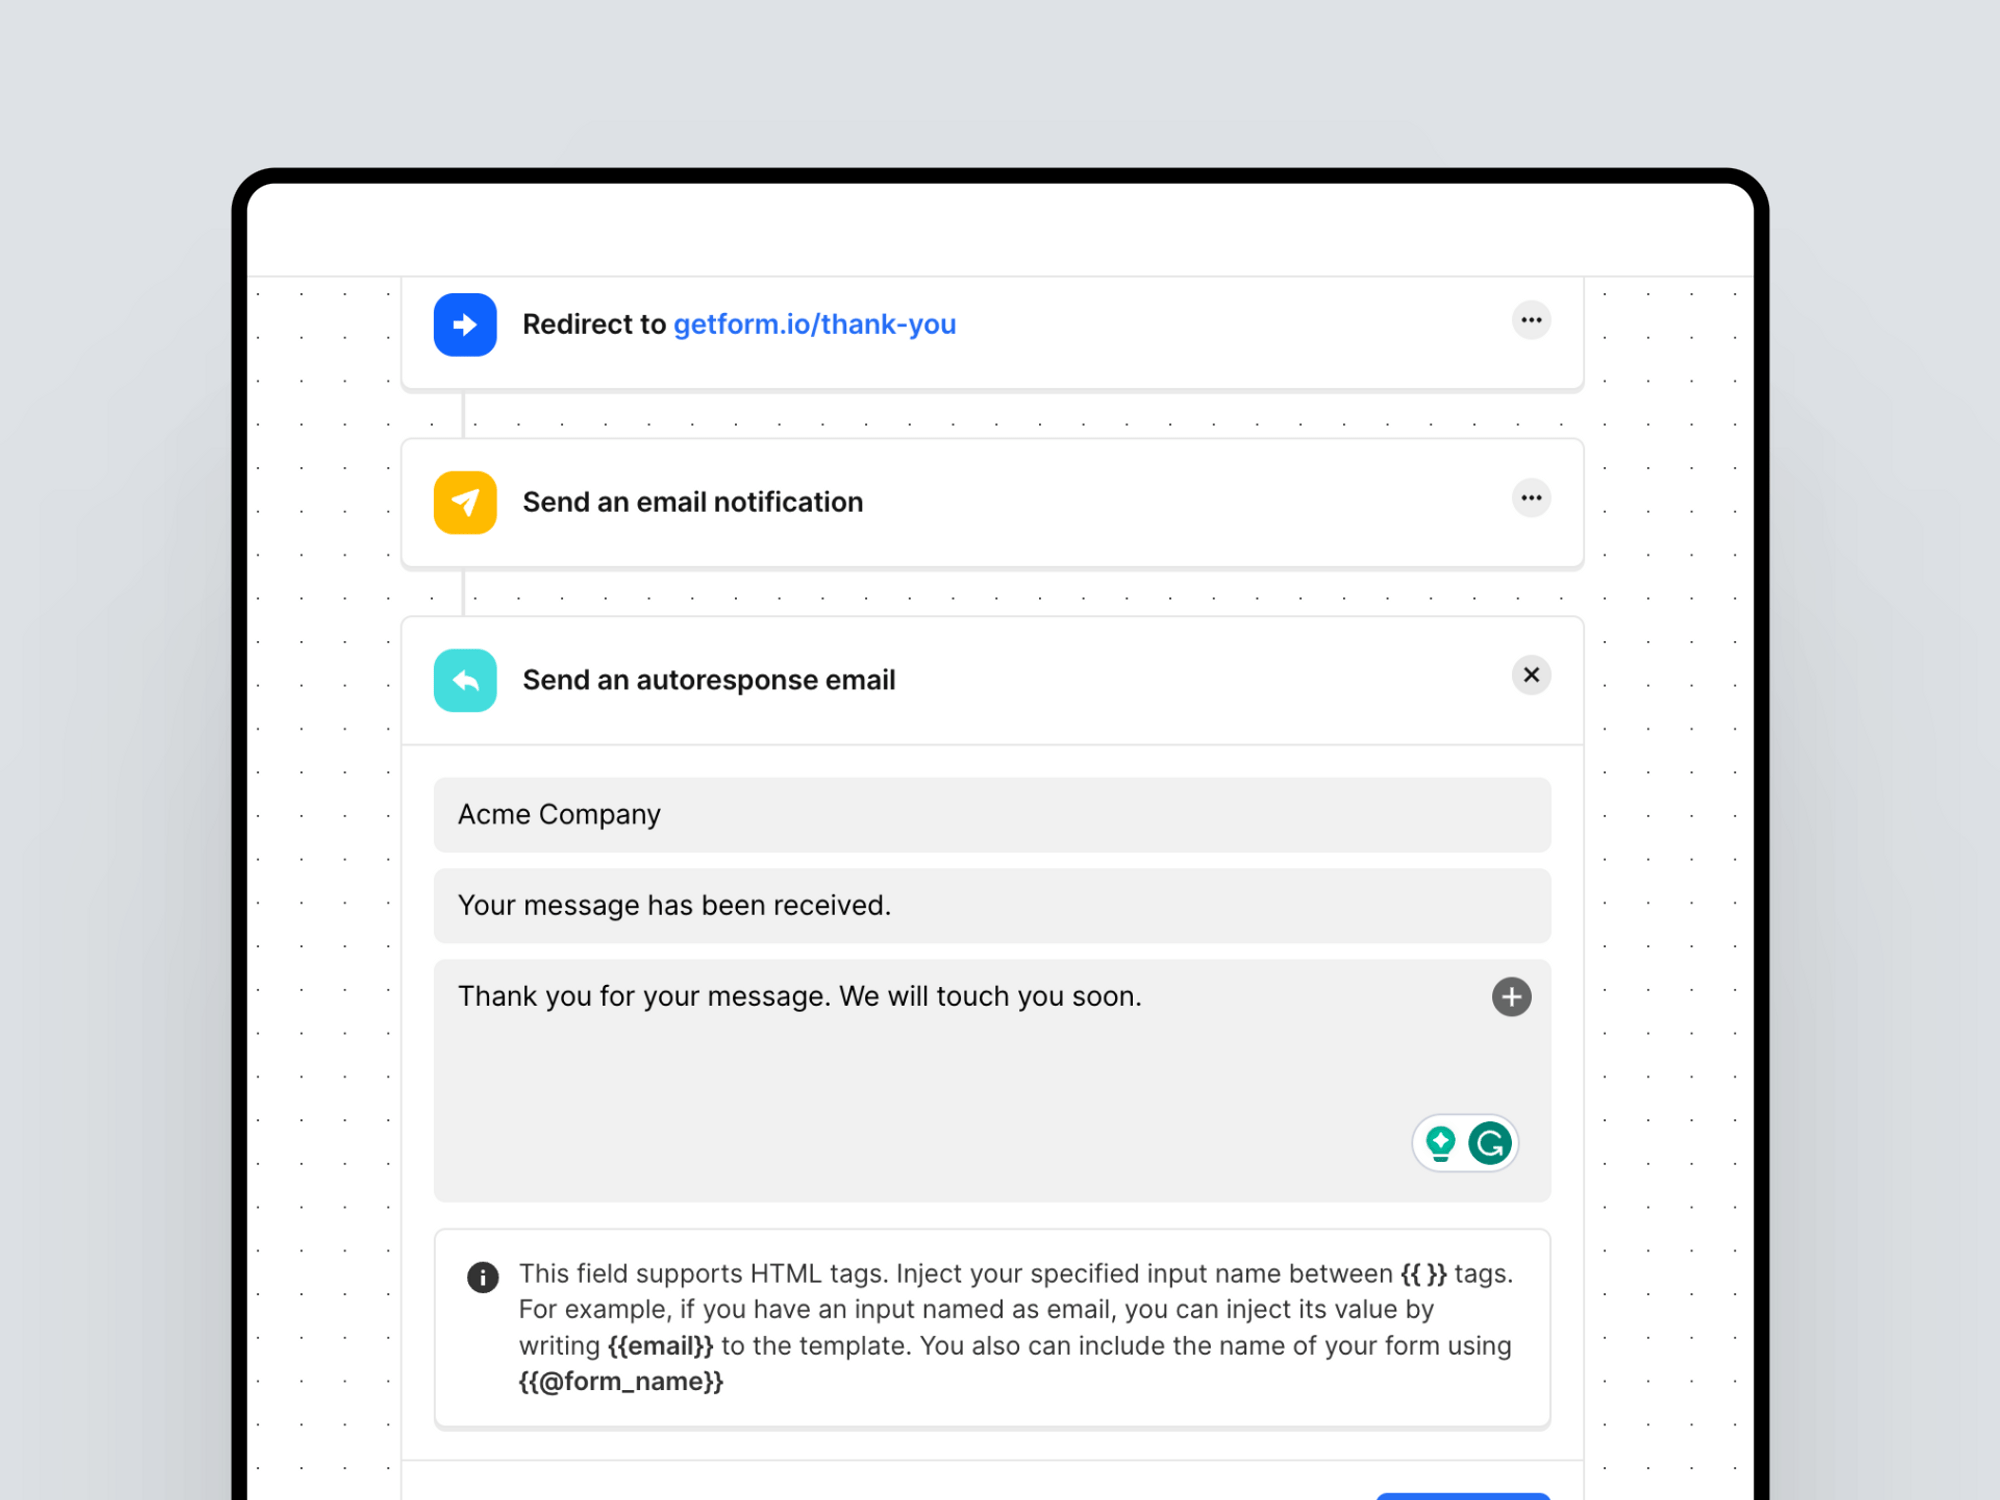
# Sending confirmation emails (Autoresponse)
Autoresponse feature allows you to send customized autoresponse emails to your form submitters. Make sure your form has type="email" field to be able to receive the email address to send the autoresponse emails.
# Form Redirections
To redirect the form submitter to another URL, set the "redirect" option.
<script type="text/javascript" src="https://getform.io/lib/v1/getform.js"></script>
<script>
 Getform.init("#form", {
  formId: "GETFORM_FORM_ID",
  toggleOnSuccess: ".w-form-done",
  toggleOnError: ".w-form-fail",
  redirect: "https://google.com", // Redirection URL
});
</script>
# Integrating Your Webflow Form with Zapier
Integrating your Getform form with Zapier lets you directly route form submissions to various apps like Google Sheets or Salesforce. Visit Zapier x Getform page for more information Zapier x Getform (opens new window)
# GDPR & Security & Data Storage Location
We keep your data safe. Getform uses Amazon Web Services (AWS) to host all of our applications and static resources.
Our application and data servers reside in the 🇪🇺 EU regions of AWS. AWS meets a variety of industry compliance standards such as SOC1, SOC2, SOC3, ISO 27001, ISO 27017 (cloud security), ISO 27018 (Cloud Privacy), PCI DSS v3.2 and HIPAA verified by a third party. For more information, please visit security page (opens new window).